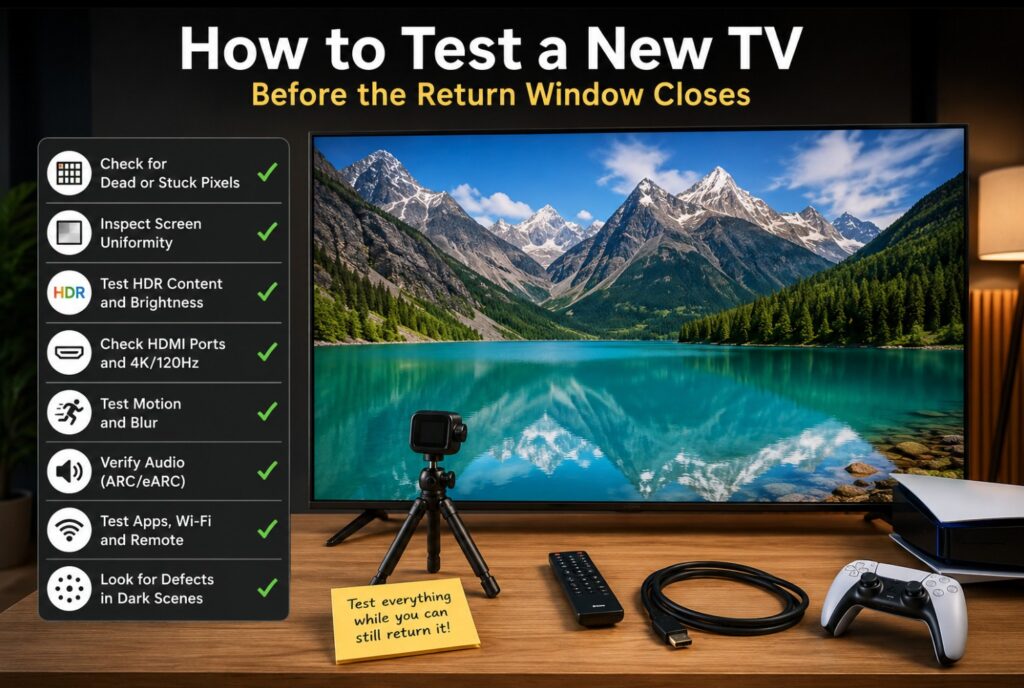

Knowing how to test a new TV can save you from discovering a panel defect, unreliable HDMI port or serious uniformity problem after the easiest return period has ended. You do not need professional calibration equipment, and you should not spend hours staring at extreme test patterns either.
The goal is simple: confirm that the television you received works properly with your normal movies, sports, games, apps and audio equipment. A new TV does not have to look mathematically perfect, but obvious problems should not interfere with everyday viewing.
Why you should test a new TV immediately
Retail return periods vary by store, country and purchase method. Some retailers allow an uncomplicated exchange during the first few weeks, while a later problem may need to be handled through the manufacturer’s warranty.
Testing early gives you time to:
- photograph physical damage;
- confirm that every included accessory is present;
- identify dead or stuck pixels;
- check screen uniformity;
- test the HDMI ports;
- verify HDR playback;
- listen for unusual noise;
- decide whether a visible flaw is tolerable.
Do not throw away the box, protective inserts, stand parts or cable covers until you are certain that you will keep the television. 📦
How to test a new TV in the first 24 hours
Use the following order rather than beginning with dark-room panel tests.
| Stage | What to check |
|---|---|
| Before assembly | Box, screen, frame, accessories and model code |
| First startup | Power, remote, Wi-Fi, menus and software stability |
| Normal content | Movies, sport, news, streaming and television channels |
| Screen checks | Pixels, tint, dirty screen effect and dark uniformity |
| Connections | HDMI, USB, ARC/eARC, console and external streamer |
| Long session | Heat, restarts, audio loss and intermittent faults |
| Final decision | Keep, exchange, return or request support |
This order matters. A television that looks slightly uneven on a test slide may appear completely clean during normal use. A television that passes every pattern but repeatedly loses HDMI audio still has a real problem.
1. Inspect the TV before removing every protective film
Check the carton for:
- crushed corners;
- punctures;
- water damage;
- signs that it was opened previously;
- a model code that does not match your order.
After lifting out the television, inspect the panel in normal room light. Look for cracks, pressure marks, bent edges, loose trim and gaps around the frame.
A slight reflection can make a large modern panel appear curved even when it is not. View it from several angles before deciding that the screen is physically bent.
Confirm that the box contains the correct:
- remote control;
- stand or feet;
- screws;
- power cable;
- cable-management pieces;
- documentation.
Photograph any visible damage before switching on the TV. Do not power up a panel with a clear crack or impact point.
2. Complete the basic setup without changing everything
Connect the TV to power and complete only the essential setup. Select Home Mode, not Store or Retail Mode.
For the first evaluation, use a reasonably accurate picture preset such as:
- Movie;
- Cinema;
- Filmmaker Mode;
- Custom;
- Professional.
Names vary by brand and region.
Turn off obvious showroom processing if it remains enabled, including extremely aggressive contrast enhancement or vivid color modes. Do not begin by copying a long calibration list from another model or screen size.
The initial objective is to see how your unit behaves from a clean, sensible baseline.
3. Test for dead and stuck pixels 🔍
A dead pixel normally remains dark. A stuck pixel may remain red, green, blue or white.
Display full-screen slides in:
- white;
- black;
- red;
- green;
- blue;
- medium grey.
Stand at your normal viewing distance first. Then move closer to inspect the panel without pressing or touching it.
| Pixel behavior | What it may indicate |
|---|---|
| Always black | Dead pixel or subpixel |
| Always bright | Stuck pixel |
| Visible only on one color | Individual subpixel problem |
| Changes position with the image | Source or compression artifact |
| Appears in the TV menu too | Display-related rather than app-related |
One defective subpixel can be difficult to notice during real content, while a bright stuck pixel near the center may remain distracting. Manufacturer and retailer pixel policies differ, so do not assume that every single pixel automatically qualifies for warranty replacement.
During the retailer’s return period, your own tolerance is often the more important question: can you see it from where you normally sit?
4. Check dirty screen effect during real motion
Dirty screen effect, or DSE, appears as darker patches, vertical areas or a slightly dirty-looking layer during camera movement. It is especially visible in football, hockey, skiing, animation and shots of a bright sky.
Use normal sport content before relying on a grey test pattern. Watch for:
- stationary dark patches while the camera pans;
- vertical bands across the pitch;
- one side appearing noticeably darker;
- color tint that follows the panel rather than the picture.
You can then display a medium-grey slide to locate the pattern. Do not judge the panel only from an overexposed photograph. Phone cameras often exaggerate mild panel variation that is difficult to see in person.
A little unevenness on a test screen is common. It becomes a practical problem when you repeatedly notice it during normal sport or camera movement.
5. Test dark scenes for blooming, bleed and banding
Dim the room and play a familiar dark movie with subtitles, stars and small highlights. 🎬
Different display technologies behave differently:
| Display type | What to watch for |
|---|---|
| Mini LED / full-array LCD | Blooming around subtitles and bright objects |
| Edge-lit LCD | Light leakage near edges or corners |
| OLED | Vertical near-black bands or tint |
| Any TV | Flashing, unstable brightness or large fixed patches |
Blooming is not the same as backlight bleed. Blooming moves with bright objects because local-dimming zones illuminate around them. Backlight bleed generally remains in a fixed location.
Do not evaluate an LCD with local dimming disabled unless you are diagnosing the backlight. Turning it off can make the entire screen look grey and create a misleading impression.
For OLED, a 5% grey pattern can reveal near-black uniformity, but use it carefully. Faint bands visible only in a completely dark room on an extreme test slide may never appear during content. Strong fixed bands visible in ordinary films are more concerning.
6. Watch motion without immediately enabling maximum smoothing
Play three types of material:
- a slow movie camera pan;
- a live sports broadcast;
- scrolling text or credits.
Look for judder, stutter, blur, dark smearing and obvious interpolation artifacts.
A fast OLED panel can make low-frame-rate films look more stuttery because each frame is held very clearly. That does not automatically mean the panel is faulty. Likewise, motion interpolation can make movement smoother while introducing a soap-opera appearance or false edges around people.
Test the default Movie or Filmmaker-type setting first. Then use a low motion-smoothing level only if the native presentation bothers you.
Do not judge the television using one poorly encoded stream. Compare at least two sources.
7. Test every HDMI port and your real devices
Connect the equipment you actually plan to use:
- game console;
- streaming box;
- Blu-ray player;
- computer;
- soundbar or receiver.
You do not need to test every advanced feature on the first evening, but every HDMI input should accept a stable signal.
Check for:
- intermittent black screens;
- signal loss;
- sparkles or colored pixels;
- missing audio;
- HDR not activating;
- the TV forgetting the input name;
- devices switching inputs unexpectedly.
For consoles and PCs, confirm that Game Mode activates and that the connection remains stable during a longer session. 🎮
If one port fails while the same cable and source work through another port, repeat the test before concluding that the input is defective. Also confirm whether the port has a special mode that must be enabled for higher-bandwidth signals.
8. Test speakers, ARC/eARC and lip sync
First listen through the TV’s internal speakers. Use dialogue, music and a scene with clear left-to-right movement.
Check for:
- rattling or buzzing;
- one speaker sounding weaker;
- distorted dialogue;
- audio dropping out;
- sound gradually moving out of sync;
- volume changing without a clear reason.
Then connect your soundbar or receiver to the HDMI port physically marked ARC/eARC.
Test both an internal app and an external HDMI source. This helps separate:
- an app problem;
- the TV’s audio processing;
- the source device;
- the eARC connection;
- the sound system.
A small lip-sync difference in one app may be software-related. Repeated audio loss across multiple sources deserves closer investigation.
9. Check apps, Wi-Fi and the remote
Install two or three apps you normally use and test them for at least 20–30 minutes.
Confirm that:
- the TV remains connected to Wi-Fi;
- apps launch without repeated crashes;
- 4K or HDR activates where expected;
- the remote responds from normal seating positions;
- voice control works if you plan to use it;
- menus do not freeze;
- the TV wakes from standby normally.
New TVs may perform background updates during their first hours, so one slow restart is not necessarily a defect. Repeated crashes, boot loops or Wi-Fi disconnections after updates finish are more concerning.
10. Leave the TV running for a longer session
Some problems appear only after the television warms up.
Watch mixed content for two or three hours and pay attention to:
- random restarts;
- the picture disappearing while audio continues;
- HDMI devices disconnecting;
- audio delay increasing over time;
- fans or electrical buzzing;
- unusual heat;
- lines appearing on the panel.
A faint electrical noise may be audible close to some power supplies, especially when brightness changes. It should not dominate normal viewing from your seating position.
Burning smells, loud crackling, repeated shutdowns or excessive heat are reasons to switch the TV off and contact the retailer or manufacturer.
How to test a new TV without creating fake problems
Test patterns are useful, but they can make you notice imperfections that never affect real use.
Avoid these common mistakes:
- examining every slide from a few centimetres away;
- photographing the screen with exaggerated exposure;
- running compensation cycles repeatedly on a new OLED;
- pressing or rubbing stuck pixels;
- changing ten picture settings at once;
- testing only low-quality YouTube videos;
- mistaking streaming compression for a panel defect;
- expecting a large consumer panel to be perfectly uniform.
Your decision should be based primarily on what you see from your normal seat during the content you actually watch.
Keep it, exchange it or request service?
| Finding | Sensible response |
|---|---|
| Mild unevenness visible only on patterns | Continue normal viewing before deciding |
| DSE repeatedly visible during sport | Consider an exchange |
| Bright stuck pixel near the centre | Consider return or exchange |
| Pixel visible only very close to the screen | Decide based on personal tolerance |
| Large fixed dark patch | Document and contact the retailer |
| Severe blooming only on extreme test clips | Compare normal content first |
| HDMI port repeatedly loses signal | Retest cable/source, then report it |
| Random restarts across apps and HDMI | Update, restart and consider return |
| Physical crack or impact mark | Stop using it and report immediately |
| Audio drops from several sources | Test internal speakers and eARC separately |
Panel replacement is sometimes appropriate, but an uncomplicated retailer exchange can be preferable while the return window remains open. The exact option depends on the retailer’s policy and local consumer rules.
Do not let the deadline expire while waiting for a problem that is clearly disruptive to disappear by itself.
A practical two-day new TV checklist ✅
First day
- Inspect the panel and accessories.
- Complete setup in Home Mode.
- Test normal streaming content.
- Check dead or stuck pixels.
- Watch sport for DSE.
- Play a dark movie.
- Connect one HDMI device.
Second day
- Test every required HDMI port.
- Connect the soundbar or receiver.
- Watch a longer movie or gaming session.
- Confirm Wi-Fi and app stability.
- Recheck any problem found on day one.
- Save photographs and video evidence.
- Decide before the retailer deadline becomes urgent.
Related TVComparePro guides
A new television can initially look disappointing because of the source, picture mode or streaming quality rather than a defective panel. Read our guide to why a new 4K TV picture can look bad before changing advanced controls.
OLED owners who notice brightness changing during static scenes should also read OLED auto-dimming fixes and limits.
A blinking warning light or television that will not remain powered on needs a different diagnostic process. See our guide to Sony TV red-light blinking patterns.
Test your television in the way you will actually use it
A good new-TV inspection combines a few controlled tests with real movies, sport, games and apps. Patterns can help locate a problem, but your normal viewing experience should decide whether the television is acceptable.
Check the panel, connections, audio and software while returning the product is still straightforward. Once the television passes those tests without distracting defects or repeated failures, you can stop inspecting it and start enjoying it.